Wash, sterilize, and dry your baby bottles and accessories with this powerful new model from Baby Brezza!
Mommyhood101 independently tests and curates baby gear to help you make informed decisions. If you buy products through links on our site, we may earn a commission.
When it comes to infant feeding, Baby Brezza makes several essentials.
From bottle sterilizers to formula dispensers, bottle warmers, and baby food makers... you name it, Baby Brezza makes it!
One of the newest additions to their lineup is the Baby Brezza Bottle Washer Pro, which offers a ton of functionality and versatility for parents looking for the absolute best.
On paper, it looks like it could be one of the best bottle sterilizers of the year - first, let's see how it performs!
Our Bottle Washer Pro Review
To review the Bottle Washer Pro, we put it through our full testing process:
- Unboxing & setup.
- Loading & preparation.
- Washing, sterilization, & drying.
- Cleaning & reusing.
The Baby Brezza Bottle Washer Pro is unique on the market for its ability to not only sterilize but to wash, rinse, and dry.
It does it all, acting like a mini dishwasher for your baby bottles and accessories, a powerful steam sterilizer, and an effective drying rack.
Is it worthy of a spot on our list of the best baby bottle sterilizers? Let's find out!
Overall Rating
Overall, we give Bottle Washer Pro 4.8 out of 5, which puts it far ahead of most competition.
Keep reading to see how we reached this conclusion!
Take-home Message
Most people don't want to read this entire article to see what we found. So here is the summary of what we loved, and what we didn't.
✔️ Powerful washing cycle.
✔️ Powerful water jets.
✔️ Effective rinse cycles.
✔️ Hot sterilization cycle.
✔️ Effective active drying.
✔️ Fits 4 baby bottles.
✔️ Fits venting stems.
✔️ Fits 4 nipples & pacifiers.
✔️ Easy-fill water reservoir.
✔️ Intuitive & versatile modes.
✔️ Kills 99.9% of germs.
✔️ Easy-empty waste bin.
✔️ Detergent tablets included.
✔️ No leaks or mess.
✔️ Bottom wheels.
✔️ HEPA air filtration.
❌ Noisy cycles.
❌ Expensive.
Overall, the Bottle Washer Pro has a lot to love, especially for parents looking for the best possible solution for baby bottle cleaning and sterilization.
Some thoughts on the minor drawbacks:
As we said, this is for parents looking for the best option. The best is always more expensive, in this case coming in at $299. If you can stomach the price, we think it's definitely worth it.
Second, just like a dishwasher, the Bottle Washer Pro is noisy, especially during the wash and rinse cycles. The sterilization and drying aren't quite as loud.
Pro-tip: Run it when you're not spending time in the kitchen.
Unboxing the Bottle Washer Pro
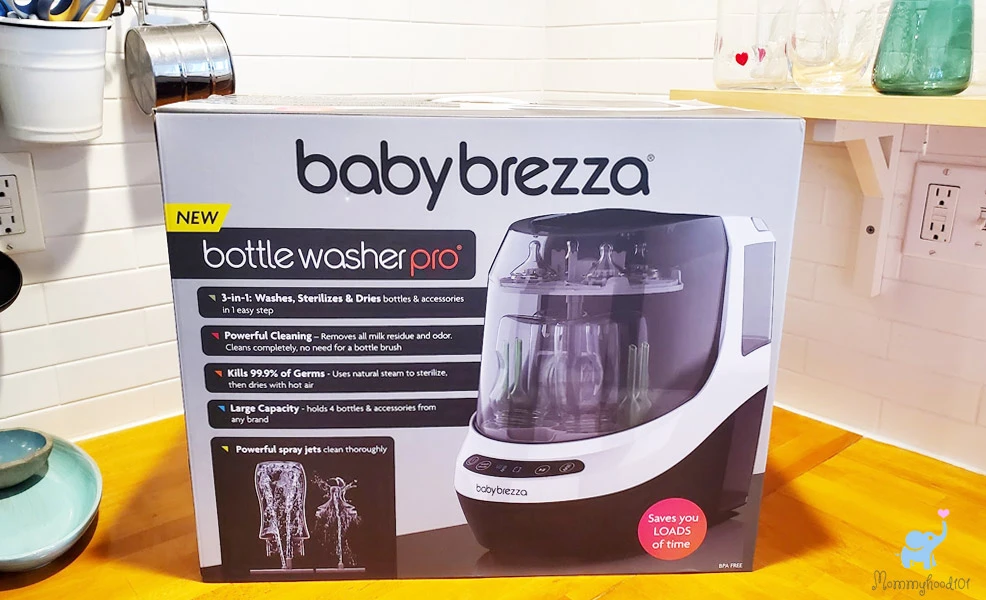
The Bottle Washer Pro arrives in a surprisingly large box.
Luckily, the team at Baby Brezza put a convenient carrying handle right on top, making it much easier to haul around.
The Bottle Washer Pro is very well packaged.
On the top and bottom are egg crate-style cardboard, in the middle is some foam padding and the sterilizer itself is wrapped in plastic.
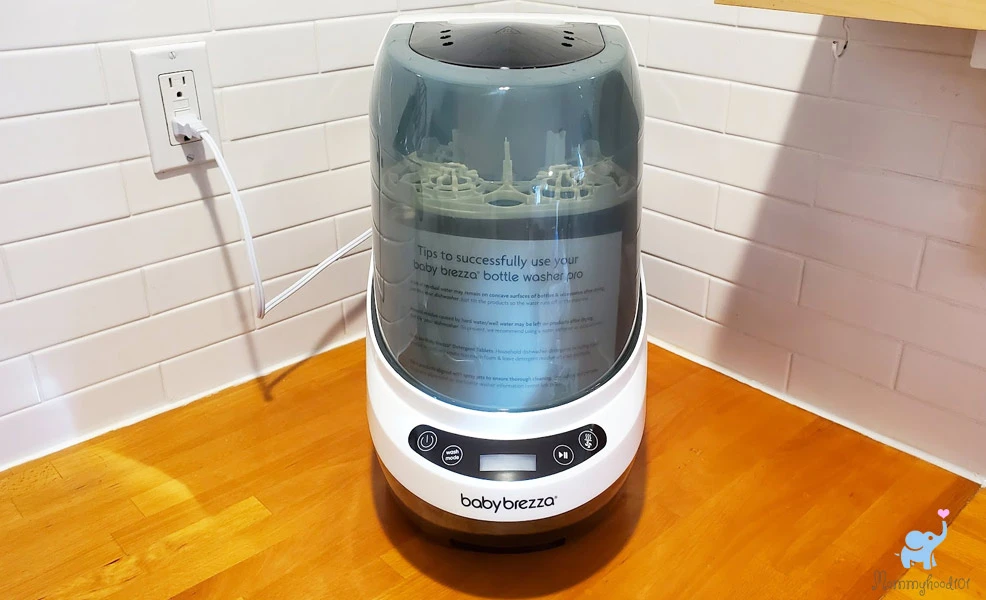
Out of the box, we were somewhat surprised by its size. Luckily we have a large kitchen counter space because the sterilizer measures a beefy 18.5" deep, 10" wide, and 15.5" high.
It's not a great fit for households with cramped counter space. For everyone else, it's a no-brainer.
When unpacking the system, make sure you remove all of the cardboard from the inside.
There is some cardboard hiding below the lower rack, so be sure to pull the rack up and off to access the bottom area.
You will notice that Baby Brezza includes two center tower rods, one longer than the other. If you only use short wide-mouth baby bottles, you will be fine using the shorter rod. For anything else, we recommend using the longer rod so you'll have more room between the bottom and top racks.
As expected, the Bottle Washer Pro is made in China.
Loading Up the Baby Brezza
We were excited to test out all of the features of the Bottle Washer Pro, including washing, rinsing, sterilization, and drying.
When you load the Washer Pro, it has two racks:
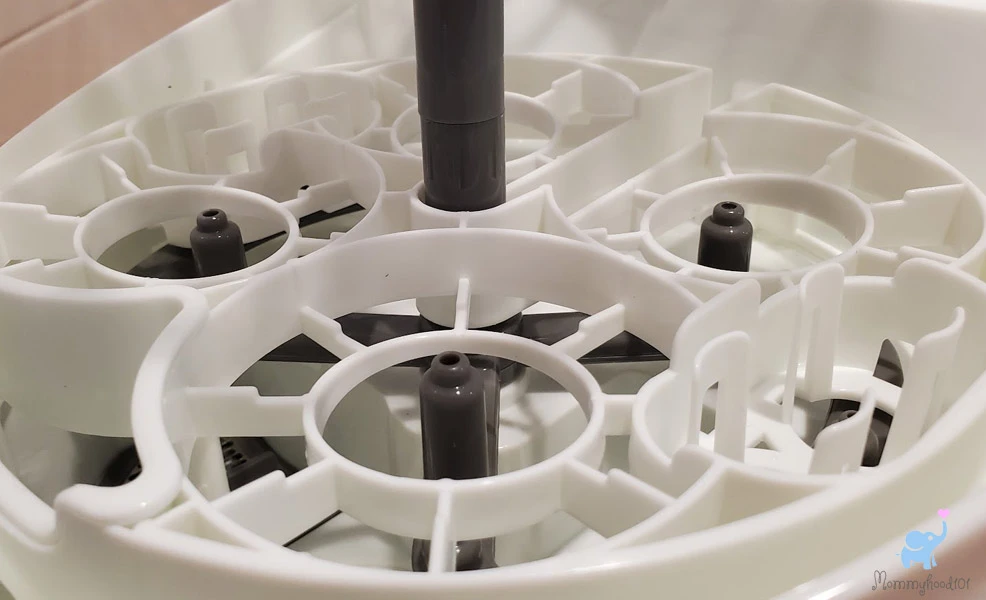
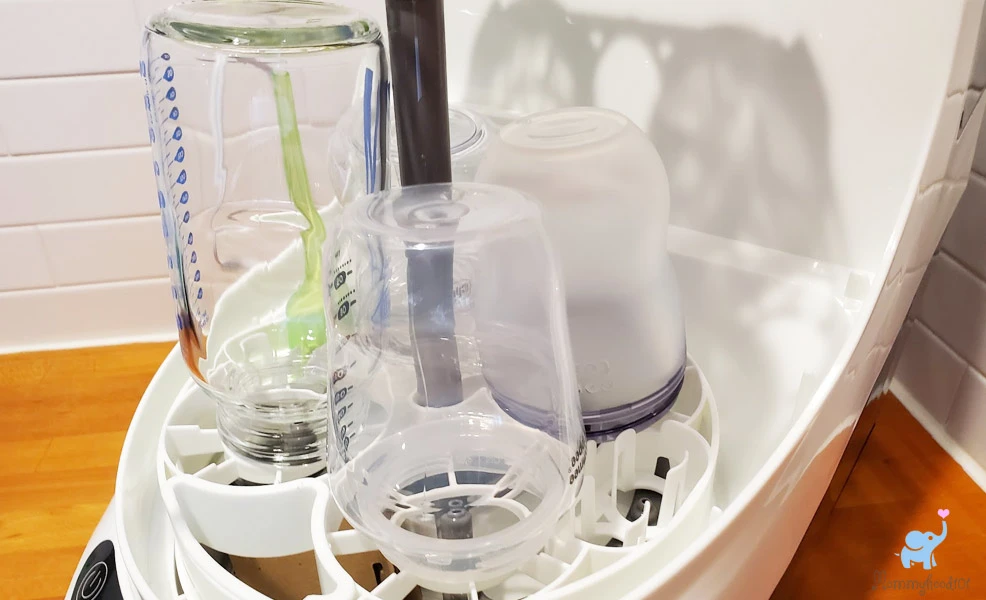
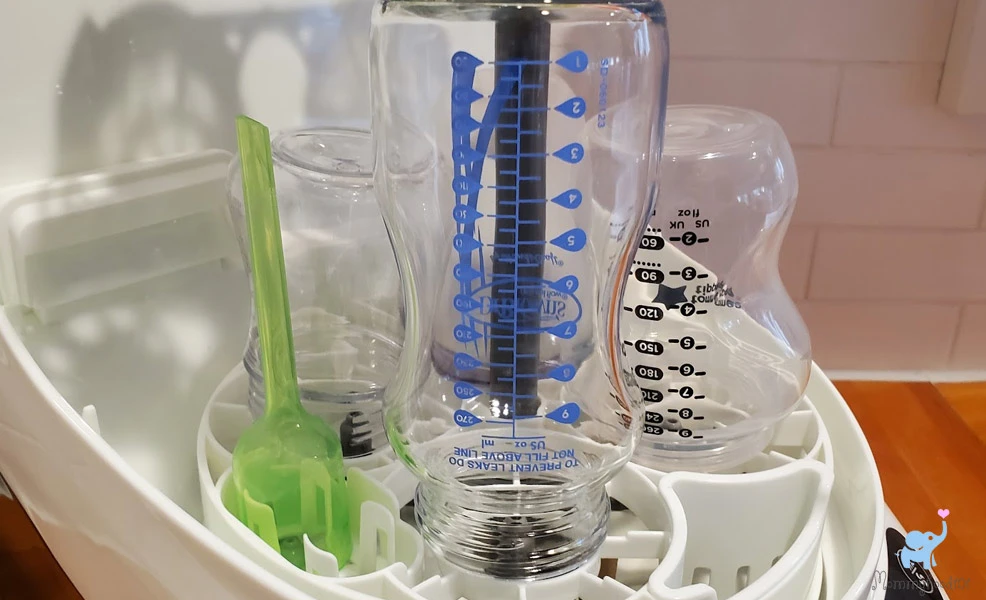
Lower rack: This is for baby bottles, which get positioned upside-down over four spray jets. There are also spots for venting systems found on Dr. Brown's bottles, which is a nice touch.
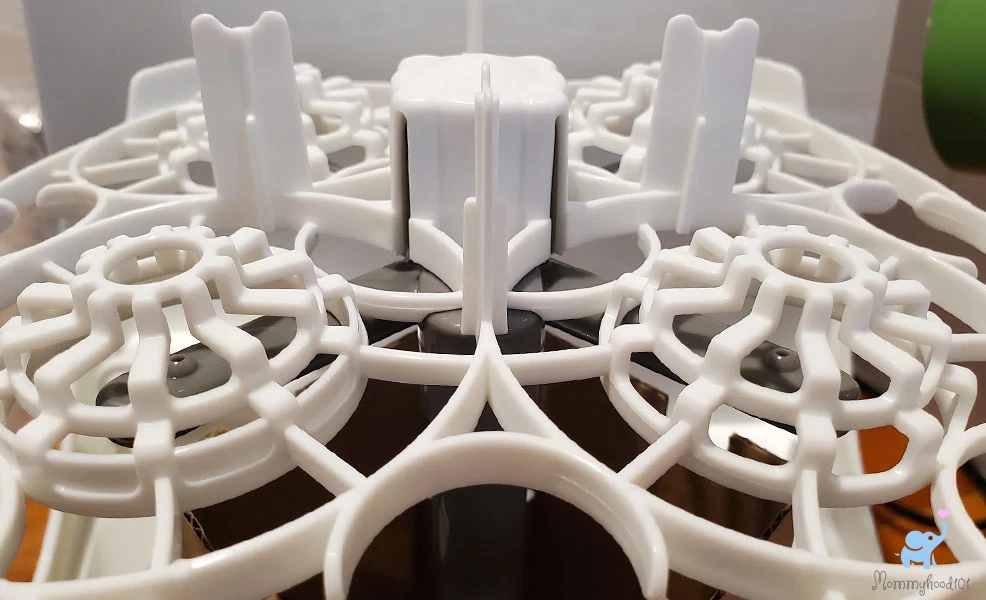
Upper rack: This is for nipples, which get positioned right-side-up over four spray jets. There is also room for pacifiers and other small bottle accessories (caps, lids).
Here is a close-up photo of the lower rack and the water jets (three of them, the fourth is hidden behind the center rod):
Here is a close-up photo of the upper rack.
Notice how the brackets are shaped to fit a variety of bottle accessories. Nice touch!
We loved the way bottles and accessories fit easily into the spacious racks.
Which Bottles & Nipples Fit?
We tried all of the best baby bottles, including:
- Tommee Tippee Closer to Nature
- Dr. Brown's Options (glass)
- Comotomo
- Chicco Duo
- Nanobebe
- Philips AVENT
- Munchkin LATCH
We tried bottles in both small and larger versions, and everything fit perfectly.
The only bottle we had a hard time fitting was the PopYum bottle, mostly because the nipple had a very tall lower ring attached to it, making it too large for the top rack.
It does fit easily into the lower rack, however.
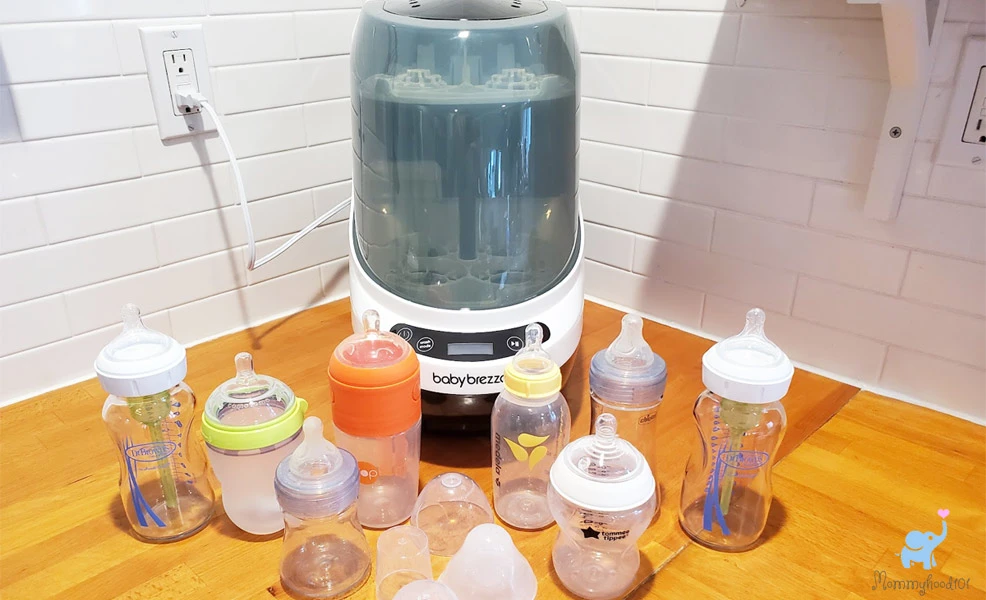
In the above photo, we demonstrate fitting Dr. Brown's Options, Comotomo, Tommee Tippee, and Chicco Duo bottles on the lower rack. In the background, you can also see a green venting system from inside Dr. Brown's bottles.
Overall, we thought everything fit very nicely into the machine, and the bottles and nipples remained stable and upright during both loading and the wash cycles.
Wash & Dry Modes
The Bottle Washer Pro has the following modes:
- Wash & Dry: Using the Wash Mode button, this will wash the bottles with detergent, rinse them three times, and then air dry them with built-in fans.
- Wash, Sterilize, & Dry: Using the Wash Mode button, this option will wash the bottles with detergent, rinse them three times, sterilize them, and then air dry them with built-in fans.
- Wash Only: Using the Wash Mode button, this option will wash the bottles with detergent only.
- Sterilize Only: Using the right side button, this option will sterilize the bottles only.
- Dry Only: Using the right side button, this option will dry the bottles only.
- Sterilize & Dry: Using the right side button, this option will sterilize and dry the bottles only.
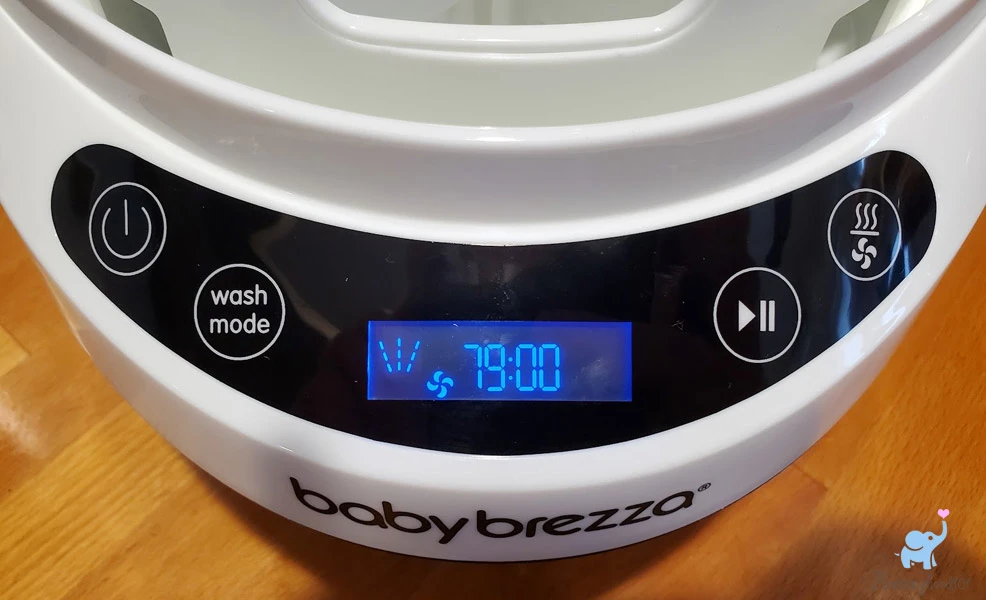
The front screen and buttons are intuitive to use and understand.
To turn the system on or off, you need to hold the power button down for 3 seconds (a safety feature).
To cycle through the Wash Modes, you press the Wash Mode button, and you will see corresponding icons on the screen.
To start or pause, press the play/pause button.
Here is what the screen and buttons look like:
There is also a convenient countdown timer that will show you how long your selected cycle is, and how much time is remaining.
The screen is easy to read, and the buttons are easy to use. Perfect!
Wash Mode Durations
When running the full cycles, things can take quite some time.
- Wash & Dry: This takes a total of 79 minutes (10 minutes of wash, 9 minutes of rinse, 60 minutes of dry).
- Wash, Sterilize, & Dry: This takes a total of 88 minutes (10 minutes of wash, 9 minutes of rinse, 9 minutes sterilize, 60 minutes of dry).
- Wash Only: This takes a total of 19 minutes (10 minutes of wash, 9 minutes of rinse).
- Sterilize Only: This takes 9 minutes.
- Dry Only: This takes 60 minutes.
- Sterilize & Dry: This takes 69 minutes.
The most common option for most families will be the Wash, Sterilize, & Dry feature, which takes an hour and 28 minutes.
Faster than our dishwasher, but slower than handwashing and sterilizing in a pot of boiling water.
Testing the Modes
We were eager to test out the features, so we loaded it up with bottles, nipples, and some bottle accessories.
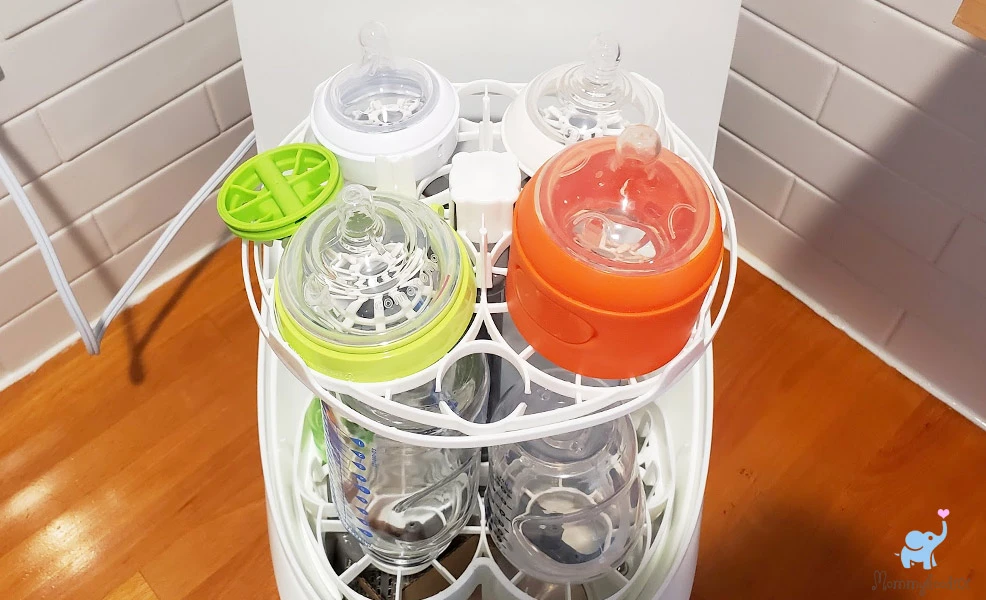
Here is the loaded top rack:
And here is the loaded top rack:
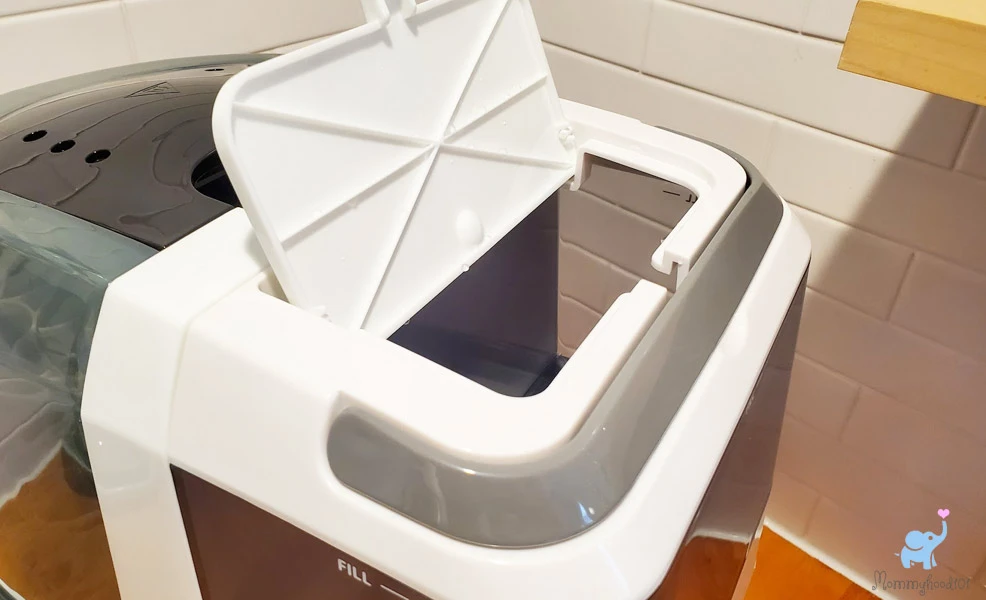
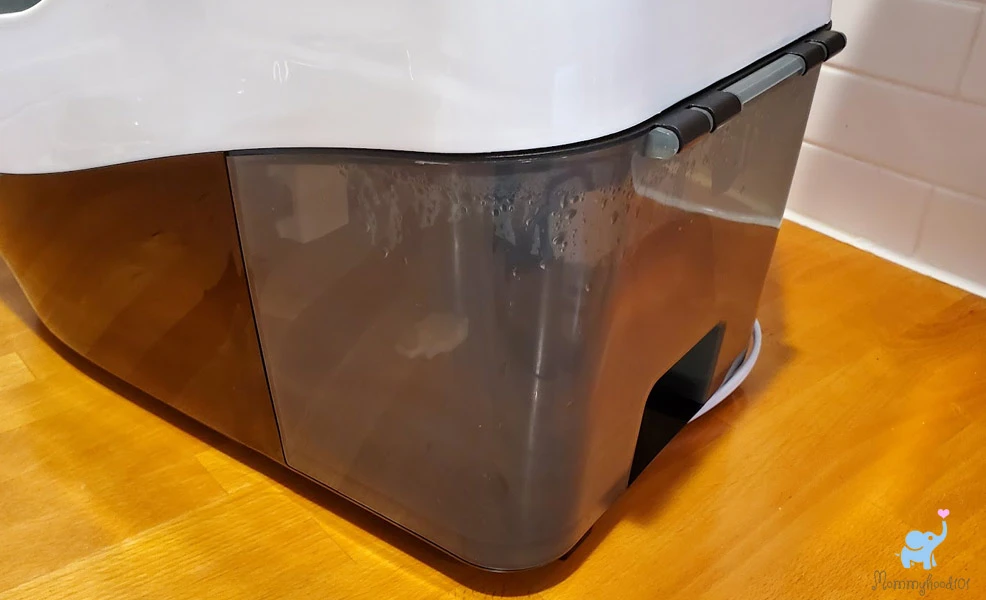
Once you load up the machine with bottles and accessories, you will need to fill the clean water reservoir.
There are two options for doing so. The first option is lifting the lid on the back of the system and filling it with water:
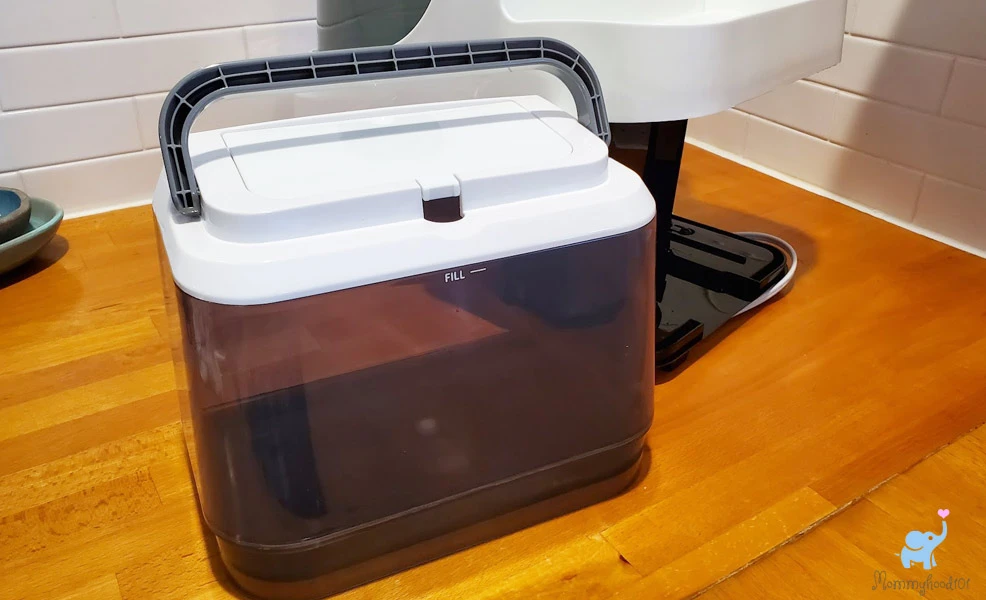
The second option, which we found more convenient, is pulling up the reservoir and bringing it to the sink.
Similar to what you do with a humidifier:
The below video walks you through the entire process from start to finish, so be sure to check it out!
Some things to point out:
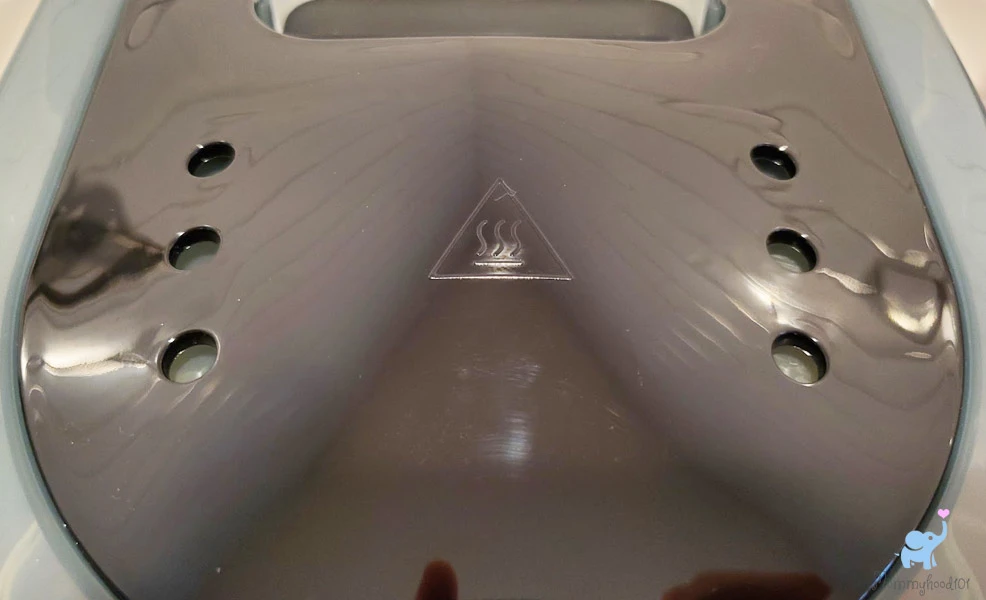
First, there are steam holes on the top. Never place anything on top of the sterilizer, and do not put it too close to the underside of the upper cabinets or anything else that might melt or get ruined by hot steam.
Of course, this area is also very hot to the touch and can cause burns when the system is running, so be careful.
Here are the steam holes:
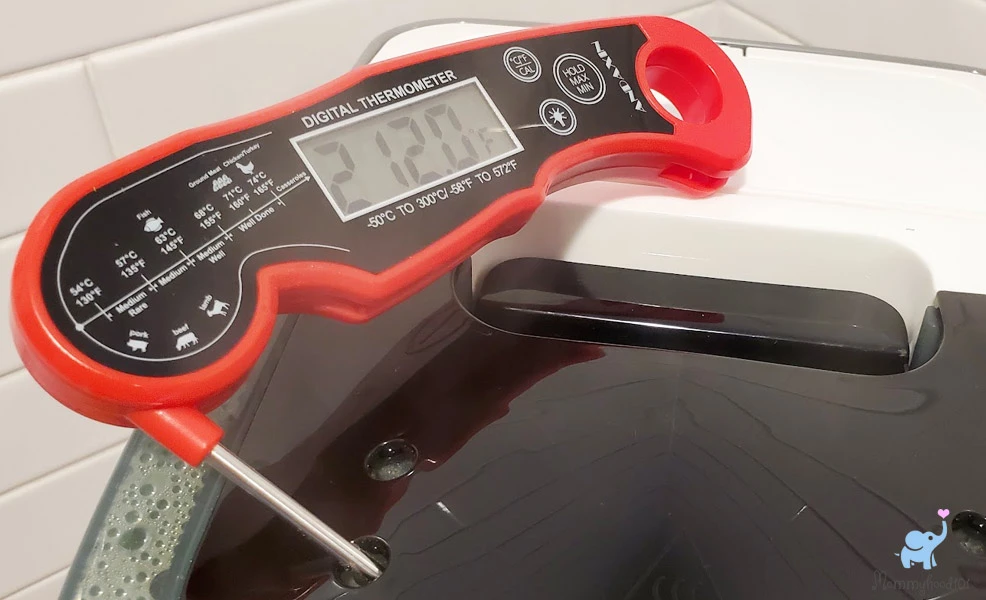
Second, during the sterilization process, we measured the temperature at the top rack.
We were able to detect a temperature as high as 212 degrees F (or 100 degrees C).
This means the lower temperature where the steam originates and hits the lower rack is likely in the range of 220-250 degrees F.
According to our research, these temperatures are sufficient to kill 99.9% of bacteria that might be on your bottles or nipples.
We've tested a lot of baby bottle sterilizers and many of them do not get close to this temperature, so we were very happy to see this!
After 88 minutes, we returned to find the system finished.
We are very happy to report that the bottles and nipples were all very dry. There was only some minor condensation left inside a few bottles.
Outside of that, we were very impressed!
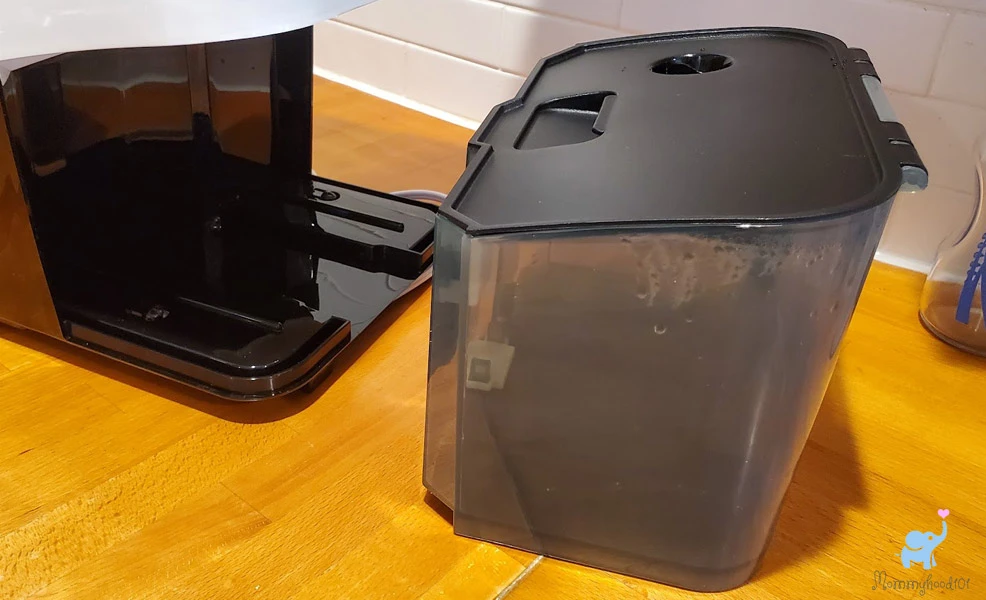
Once the system has finished, it will empty all of the dirty water into a lower bin on the back of the unit.
Here is a photo of that waste water bin:
Grab it on the bottom and pull it straight out, and you can dump it right into your sink.
Easy peasy!
A few additional small points to make about the system that we appreciate.
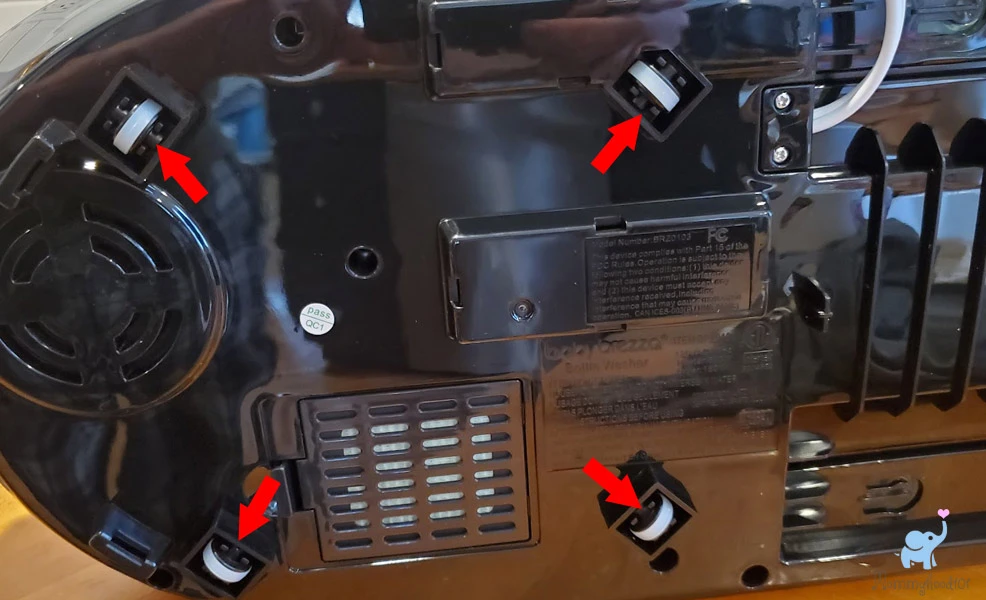
First, it has four small wheels on the bottom. This makes it very easy to swivel around on your counter and pull out the clean water reservoir, or waste water reservoir, or even roll the unit right up next to your sink to fill up the clean water reservoir.
Nice touch! Here are the wheels:
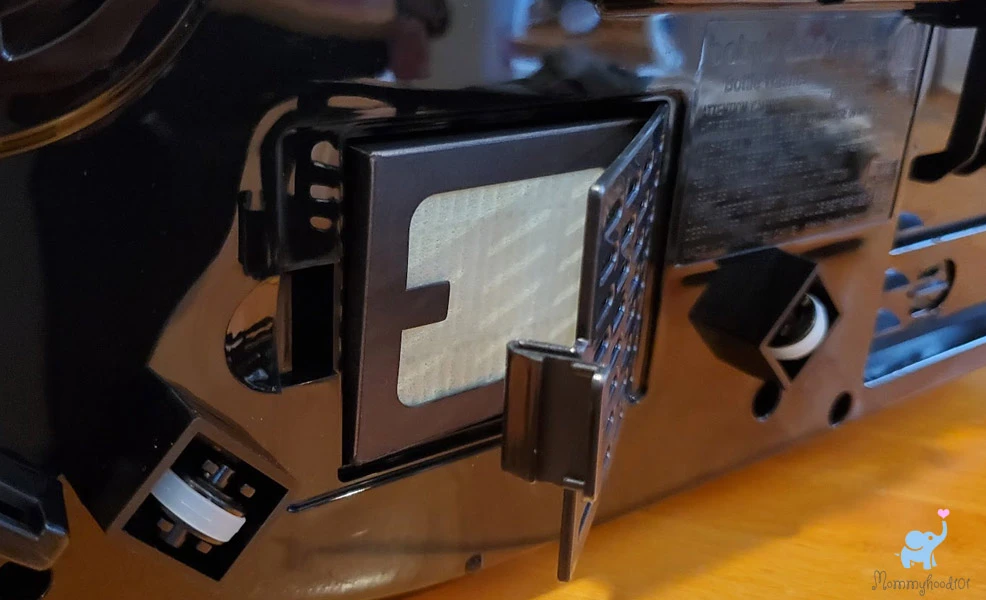
Second, the Bottle Washer Pro has a replaceable HEPA filter on the bottom.
Here it is, hiding behind a little door:
Because this model uses active air flow for drying, it pulls air in from the base of the machine and pushes it through a fan and into the chamber.
The HEPA filter ensures that the air pulled into the drying system is clean and fresh.
Another thoughtful touch by Baby Brezza!
Conclusions
In conclusion, the Baby Brezza Bottle Washer Pro emerges as a worthy contender in the realm of baby bottle sterilizers.
Its multifunctionality, including washing, rinsing, sterilizing, and drying, sets it apart as a unique solution for parents seeking the best hygiene for their baby bottles and accessories.
With an impressive overall rating of 4.8 out of 5, it outshines much of its competition, offering powerful washing and sterilization cycles alongside convenient features like an easy-fill water reservoir and HEPA air filtration.
While it comes with a higher price tag and produces some noise during operation, its efficacy and convenience make it a worthy investment for parents prioritizing the best for their little ones!
Prices and Where to Buy
Coming in at about $299, you can purchase the Baby Brezza Bottle Washer Pro at most major retailers, including Amazon.
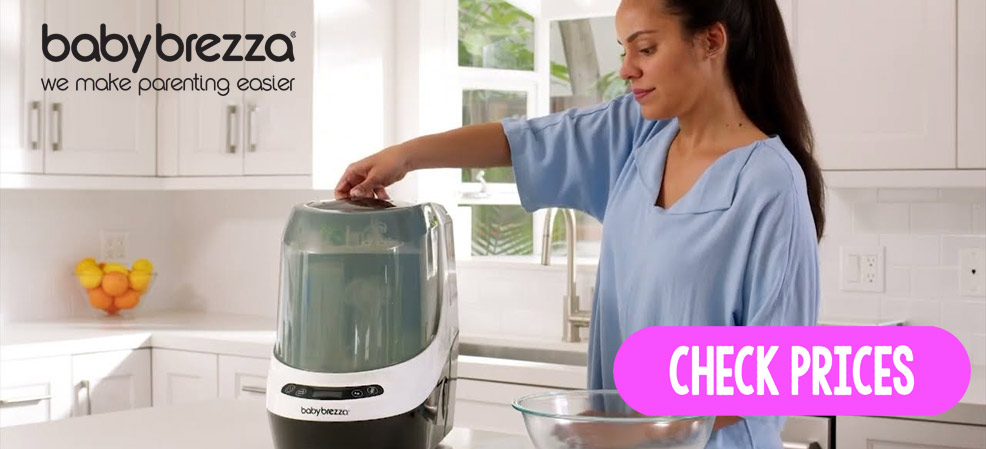
Click the below image to check the current prices.

